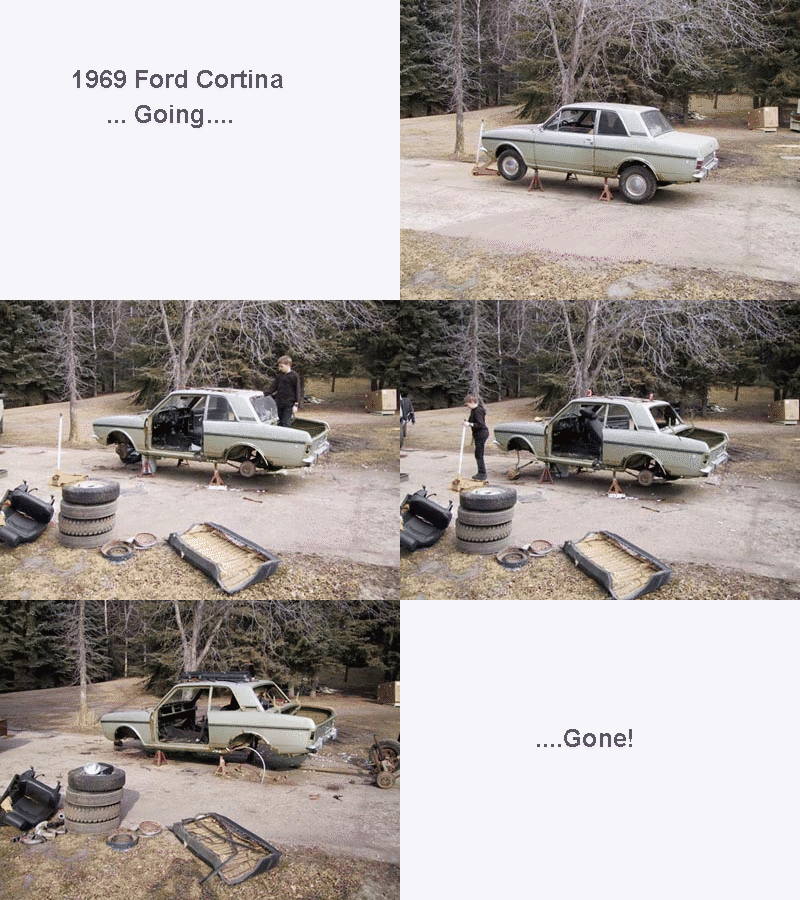
| The amazing disappearing
GT body. It was rusty, crusty and had moss growing on the paint! Too bad
to salvage but an excellent donor to transmogrify the low milage Deluxe into
the GT it always wanted to be. |
|
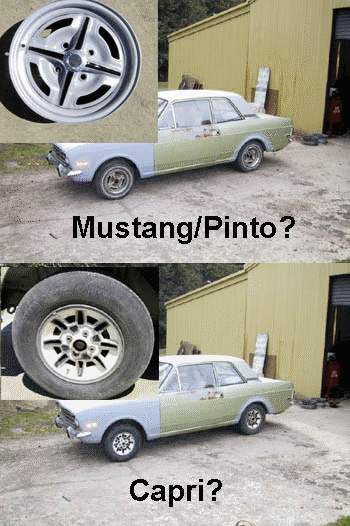
| So, which wheels look better?
The self-serve auto wrecker is a fantastic source of bits for restoration
projects. There's no end to the number of 5x13 'rally' style wheels from
early Mustang II or Pinto and occasionally a Capri comes along complete with
5.5x13" mags. I'm still looking for one of those with an 'uprated' Kent engine.
The car on the right came from
the wrecking yard! Yep, we picked it up for $300 CDN. It has covered just
38,000 miles. It required only minor repairs to the rear wheel arches
|
|
| It's time to reveal my sources.
Here's the links to my suppliers.
More links to come... when I
have time to compile them all.
|
Burton
Power
- engine, gearbox and brake parts
Past Parts
- hard to find brake and suspension parts
Dave Bean Engineering
- North American supplier of Ford parts
Pierce Manifolds
- maker of aluminum heads and manifolds
Car
Orphanage
-suspension bushings
ARP Fasteners
- rod bolts, head bolts... proper stuff
Leda Suspension
- they make MK II strut inserts EXACTLY like the originals.
|
Progress report 1 - June
The GT shell has gone on to its
new life as a soup can or Honda, drivetrain is out of the new shell, the
GT engine, gearbox, rear axle and suspension are all stripped, sandblasted
and powder coated.
Most of June has been spent in
the boot as you can see on the right. It now has 70 l fuel capacity and room
for 2 spare tyres.
|
 I
I |
Progress report 2 - July
In the back seat area I've installed
an aluMINIum bulkhead and plated in the side panels too. This week (July
9) it's off getting the roll cage installed
|

|
Progress report 3 - August
In the life of a project there's
always that gratifying moment when it turns that corner and starts actually
IMPROVING! That is usually when the primer goes on signifying the end to
major body work. Only minor dinging left to do then blocking the primer before
paint.
|

|
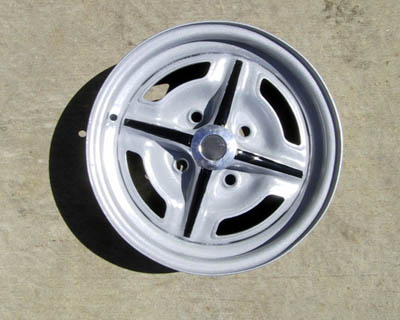
| Whod'a thunk these wheels
came from the bone yard for $5 ea? Of course that doesn't account for the
$20 to have them chemically cleaned and $25 to have them powder coated. I've
changed the wheel studs to the size used by full-size Ford's: 1/2"
Funny, for $5 I could buy a whole
Pinto with 4 or 5 wheels.
|
|
Progress report 4 - September
All the engine, gearbox, brake
and suspension bits necessary for the restoration arrived within the last
few weeks so it's time to get some real work done!
These Kent engines are pretty
finicky to setup especially when changing the cam to one with higher lift
and duration, plus changing the pistons and head to the uprated style.
I also went for the Pierce aluminium head which is where most of the work
was done. First step was to dry fit the engine with the new pistons fitted
to the block but not much other machining done. This step was necessary
to ensure there was 0.060" clearance between the valves and piston crown.
I had to take an additional 0.030" off the valve pockets in the piston
crown plus widen them for the bigger valves. A home machine shop is invaluable
when it comes to fiddly work like pocketing pistons. Even with a jig to
hold the piston on the milling machine bed there were still 4 different
setups to do the cutting and it took most of a day. With that done the
bottom end went back to the machine shop for crank grinding and balancing
of all the rotating bits. The crank then went out for liquid nitriding.
The top end wasn't so straight
forward. The Pierce head is a copy of the stock uprated head except in
aluminium so working with it is a joy. My engine shop punched out the seats
to take 1.60" x 1.34" valves after which I opened up the throats to about
89% of the valve size, cleaned up the ports and matched the twin Weber
manifold. On dry fitting the springs I found that the locating cups are
machined too small for the springs Kent supplied. A jig, consisting of
a stud bolted to the milling machine bed, was used to center the guide
under the boring head and with 8 quick setups the locating cups were large
enough. It's a good thing I made a jig because I had to go back once more
and lower the spring platforms 0.030" to get the minimum clearance between
spring coils.
|
 Cutting the valve
spring platforms wider and deeper to fit the springs supplied with
the Kent 234 cam kit
|
 It doesn't take very
long to cut the platforms with a boring head.
|
| Holidays are
a marvellous thing especially when you don't have to go anywhere and you
can stay in the shop doing what you want to do, like blitz the suspension,
brakes, gearbox and engine! Rear axle is in, front suspension, except the
struts (I'll wait for the adjustable bits to arrive) is in, gearbox and
engine are in! Now, where did I put those Weber's? |
 It hasn't been this
clean in 30 years!
|
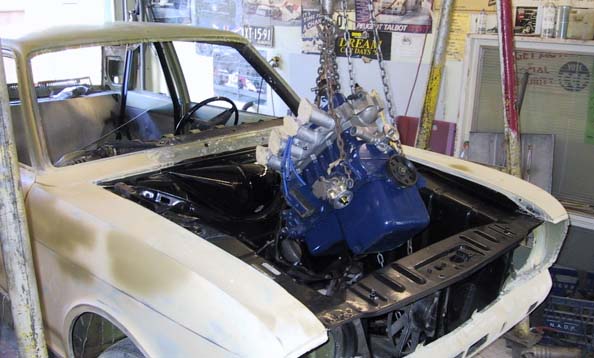 There's nothing like
working with clean parts on a clean car
|
|
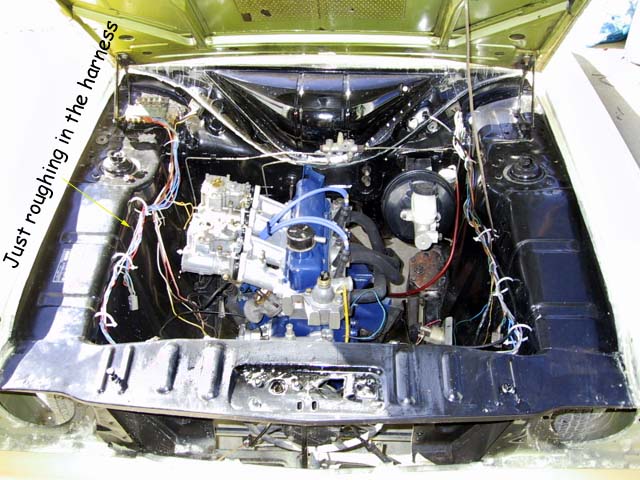
Home at last. The
engine that came out of this shell is pretty much garbage, this GT engine
sat for 10 years before this major rebuild. In this picture you can see
the twin 40 DCOE's stuck on so I can figure out what air filters I need
to get, the old wiring harness cut open and roughed in so I can start
modifying it for the 75 amp Hitachi alternator and the headlamp relay
bank. The brake master cylinder is from a Ford Ranger truck.
|

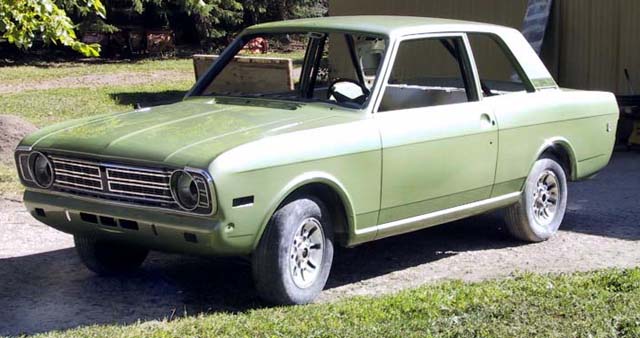 There aren't many aspects
of restoration that I don't enjoy, but blocking primer is one. It's tedious,
physically demanding and difficult to determine when you are actually
finished. The body shop that did the final paint said this was in the
top 2% of the cars they've seen come in for their 'mask and spray' service.
This is simultaneously gratifying and disconcerting. Gratifying because,
well, everybody likes to have their ego stroked once in a while, but
disconcerting because I did the work in my shop with nothing more than
a hammer, dolly, body file and $10 worth of wet/dry sandpaper. It begs
the question, what do they do to earn so much??
|
|
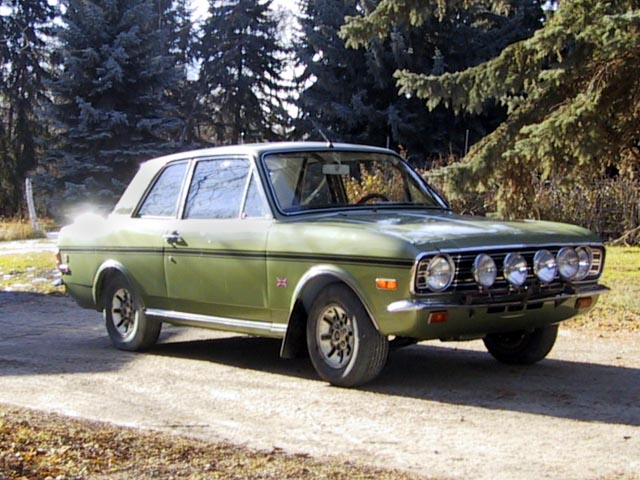
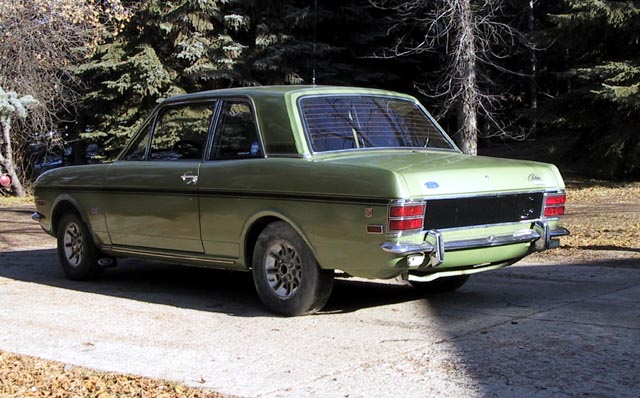
This is the final update for 2001.
Winter is coming to the land of the Wild Goose which means
the garage space has to be cleared for parking the wimpy
car, so the Cortina is back in storage with the other
'diamonds in the rust'. Since it was painted in September
the following have been accomplished:
 |
Electrical system
has been redone, relays, bigger fuse block, rally lights, electric fan and rear defrost added |
 |
All the glass
reinstalled - what a crappy job that is! |
 |
Tower brace
fabricated, suspension installed and settings roughed
in |
 |
Headliner made
(thanks Jane!) and installed |
 |
Wheel arch liners
made and installed |
 |
Chrome cleaned up
and installed |
 |
a bazillion little
problems that crop up from a car sitting for decades
have been cleaned up |
In the spring, it seems
like such a long way off, I'll get the Webers on and the
engine fired, the brakes bled and exhaust system made.
After about a week's worth of work it should be moving
under its own power. After I get the sump and tank shields
built it will be time for shake down runs on the gravel
roads in central Alberta. Stay tuned!!
|


